


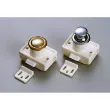


Do Check your valves regularly? These are critical to the safety of your boat.
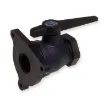
FOR ALL MARELON® INTEGRATED VALVES
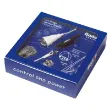
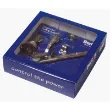
The Marelon® seacock you have received for replacement has been factory assembled and pressure tested to Marine U.L. standards and conforms to all current A.B.Y.C. H-27 standards. All Forespar® Marelon® valves are assembled and pressure tested to these standards before shipping.
Please read carefully and be sure you understand each of the procedures below before starting this process.
To replace a valve in your yacht you will need the following:
1. Medium size Phillips-head screwdriver (do not use powered screwdrivers)
2. Water-proof grease (winch grease or LanoCote® will do)
3. Teflon® tape (Plumbers Tape) or nylon-safe pipe-dope for thread sealing
4. Flash light
5. Easy access to valve to be removed & replaced
6. Replacement hose clamps if old ones are not reusable (two per tailpipe)
7. Replacement hose if needed
8. Sponge or rags for cleanup
9. One volunteer to go overboard to plug the thru-hull
This procedure can be done without hauling the boat. Forespar® is not responsible for haul-out or labor charges for valve replacement.
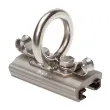
Determine the style/age of valve you have by checking for gaskets in valve “stack” joints. Valves that have these gaskets are of a more recent generation. You can “feel” these gaskets by rubbing your finger across any of the valve body “joints”. The new replacement valve has these gaskets and threaded inserts. Older valves have “O” rings instead of gaskets and may not have threaded inserts in the base. These “O” rings and inserts are not visible from the outside. If your valve does not have these gaskets, then please pay particular attention to step five (5).
Determine the style/age of valve you have by checking for gaskets in valve “stack” joints. Valves that have these gaskets are of a more recent generation. You can “feel” these gaskets by rubbing your finger across any of the valve body “joints”. The new replacement valve has these gaskets and threaded inserts. Older valves have “O” rings instead of gaskets and may not have threaded inserts in the base. These “O” rings and inserts are not visible from the outside. If your valve does not have these gaskets, then please pay particular attention to step five (5).
Step one:
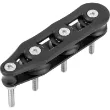
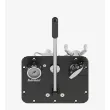
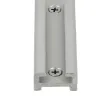
Be sure you have access to hose clamps and can easily remove the hose. Be sure you can reach and see the four Phillips head bolts on the top of the valve assembly. The hose and these four bolts must be removed, so access is critical for this procedure.
Be sure you have access to hose clamps and can easily remove the hose. Be sure you can reach and see the four Phillips head bolts on the top of the valve assembly. The hose and these four bolts must be removed, so access is critical for this procedure.
Step two:
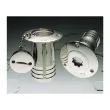
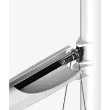
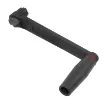
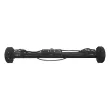
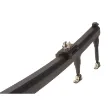
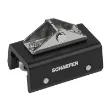
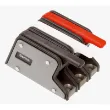
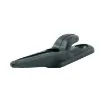
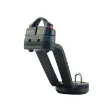
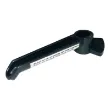
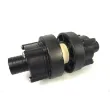
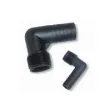
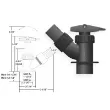
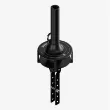
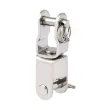
Be sure the replacement valve has the tailpipe/elbow hose barb in the proper orientation to the handle for your specific application, i.e. the hose barb is facing the correct direction to accept the hose and the handle is in correct position for ease of operation/use when installed. Check for clearance of movement for the handle, making sure a bulkhead, another valve or hose does not restrict handle operation. Remove the new valve from the round base flange. Configure new valve, if needed, per above. Hold this stack together with the gasket on the bottom keeping the four bolts in place. Set aside in a place reachable from the old valve to be removed. You will want to grab this quick when the old valve is taken off the base flange in the boat.
Be sure the replacement valve has the tailpipe/elbow hose barb in the proper orientation to the handle for your specific application, i.e. the hose barb is facing the correct direction to accept the hose and the handle is in correct position for ease of operation/use when installed. Check for clearance of movement for the handle, making sure a bulkhead, another valve or hose does not restrict handle operation. Remove the new valve from the round base flange. Configure new valve, if needed, per above. Hold this stack together with the gasket on the bottom keeping the four bolts in place. Set aside in a place reachable from the old valve to be removed. You will want to grab this quick when the old valve is taken off the base flange in the boat.
Step three:
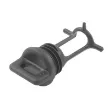
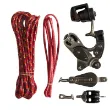
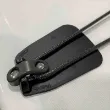
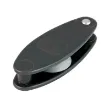
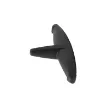
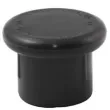
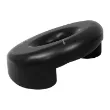
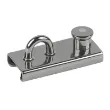
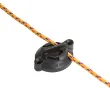
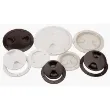
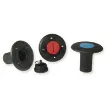
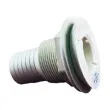
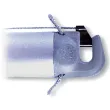
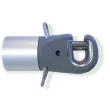
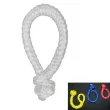
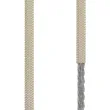
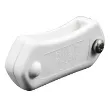
Remove the cap on either of the valves. This cap (white, with a loop on top and “O” ring on body) is the thru-hull plug you will use to plug the thru-hull from the outside. One volunteer is required to get wet or you can contact your local bottom cleaner/diver to do this for you. Tie a lanyard long enough to reach topsides and place the plug/cap into the thru-hull that serves the valve to be replaced. This is so you only have to get wet once. BE SURE YOU PLUG THE CORRECT THRU-HULL! Water pressure will keep the plug/cap in place. If you have marine growth on the thru-hull, be sure and clean this off enough for the plug/cap to fit in all the way. Excessive growth on the inside of the thru-hull will allow more water to seep around the “O” ring. This is not vessel threatening but can add to the amount of water that will have to be cleaned up later.
Remove the cap on either of the valves. This cap (white, with a loop on top and “O” ring on body) is the thru-hull plug you will use to plug the thru-hull from the outside. One volunteer is required to get wet or you can contact your local bottom cleaner/diver to do this for you. Tie a lanyard long enough to reach topsides and place the plug/cap into the thru-hull that serves the valve to be replaced. This is so you only have to get wet once. BE SURE YOU PLUG THE CORRECT THRU-HULL! Water pressure will keep the plug/cap in place. If you have marine growth on the thru-hull, be sure and clean this off enough for the plug/cap to fit in all the way. Excessive growth on the inside of the thru-hull will allow more water to seep around the “O” ring. This is not vessel threatening but can add to the amount of water that will have to be cleaned up later.
Step four:
With thru-hull plug in place, remove hose clamps and hose. Some water may spill out. Be ready with sponge or rag. Some seepage is inevitable even with plug/cap in place due to bottom paint and/or marine growth inhibiting the “O” ring from making a complete seal in the thru-hull. Be sure the replacement valve is within easy reach.
With thru-hull plug in place, remove hose clamps and hose. Some water may spill out. Be ready with sponge or rag. Some seepage is inevitable even with plug/cap in place due to bottom paint and/or marine growth inhibiting the “O” ring from making a complete seal in the thru-hull. Be sure the replacement valve is within easy reach.
Step five:
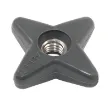
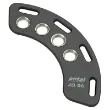
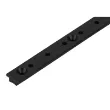
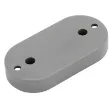
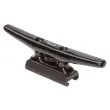
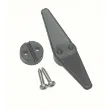
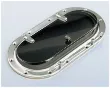
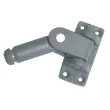
Remove the four bolts on the top of the old valve assembly. Be sure all four bolts are fully removed from the valve base (Round black flange base mounted to inside of the hull). If your valve is of the older style without gaskets, be sure to remove the old “O” ring on the valve base flange. It may stick to the base. This “O” ring will not be used in the new assembly. Be sure no debris gets on this base flange surface. Water will not interfere, but dirt and debris will not allow the gasket to seal properly. Be sure the gasket on the new replacement valve stack is lubricated with grease. It does not require a large amount, but the gasket surfaces (both sides) should not be dry. Simply rub grease with your finger all over the gasket.
Remove the four bolts on the top of the old valve assembly. Be sure all four bolts are fully removed from the valve base (Round black flange base mounted to inside of the hull). If your valve is of the older style without gaskets, be sure to remove the old “O” ring on the valve base flange. It may stick to the base. This “O” ring will not be used in the new assembly. Be sure no debris gets on this base flange surface. Water will not interfere, but dirt and debris will not allow the gasket to seal properly. Be sure the gasket on the new replacement valve stack is lubricated with grease. It does not require a large amount, but the gasket surfaces (both sides) should not be dry. Simply rub grease with your finger all over the gasket.
Step six:
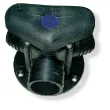
Carefully place the new valve stack onto the old base (again, be sure it is clean) with the hose barb facing the desired direction and the handle properly oriented. Be sure the bolts align with the holes on the base flange. You may need to use the original bolts from your old valve stack. Hand-tighten the bolts as far as possible into the base flange. With the non-powered, Phillips head screw-driver, tighten bolts until they are “snug”. Each bolt should be tightened as equally as possible BY HAND PRESSURE ONLY. Do not use a wrench or pliers to increase tightening force. Do not over tighten as you may run the risk of stripping out the threads on the flange. Our test show that you have to exert more torque than the average person can achieve with a hand held screwdriver to strip these threads. DO NOT OVER TIGHTEN THE BOLTS! Sponge up any water around valve. Dry the outside of the valve body, base flange and inside surface of hull around the base flange as much as possible. Activate the handle. Be sure there is adequate clearance for proper function. If you have a female threaded top valve configuration, replace tailpipe or elbow required. Be sure to use Teflon® tape or pipe-dope on all the threads. Replace hose and hose clamps. Be sure to use two hose clamps on each tailpipe/hose connection.
Carefully place the new valve stack onto the old base (again, be sure it is clean) with the hose barb facing the desired direction and the handle properly oriented. Be sure the bolts align with the holes on the base flange. You may need to use the original bolts from your old valve stack. Hand-tighten the bolts as far as possible into the base flange. With the non-powered, Phillips head screw-driver, tighten bolts until they are “snug”. Each bolt should be tightened as equally as possible BY HAND PRESSURE ONLY. Do not use a wrench or pliers to increase tightening force. Do not over tighten as you may run the risk of stripping out the threads on the flange. Our test show that you have to exert more torque than the average person can achieve with a hand held screwdriver to strip these threads. DO NOT OVER TIGHTEN THE BOLTS! Sponge up any water around valve. Dry the outside of the valve body, base flange and inside surface of hull around the base flange as much as possible. Activate the handle. Be sure there is adequate clearance for proper function. If you have a female threaded top valve configuration, replace tailpipe or elbow required. Be sure to use Teflon® tape or pipe-dope on all the threads. Replace hose and hose clamps. Be sure to use two hose clamps on each tailpipe/hose connection.
Step seven:
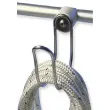
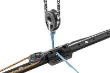
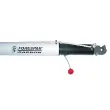
Close the valve. Now you are ready to remove the plug/cap. You should be able to pull the lanyard you secured in step three. If there is too much resistance, use a boathook to achieve a better angle of pulling force on the plug. After removing the plug, activate valve and check for leaks. You should not have any around the valve stack joints! If you do, carefully tighten the bolts a little bit more. If you have seepage around tailpipes or elbows that are screwed into a female topped valve, check the Teflon® tape around the threads. You may need to clean and reapply tape and reinstall. Congratulations! You should be done.
Close the valve. Now you are ready to remove the plug/cap. You should be able to pull the lanyard you secured in step three. If there is too much resistance, use a boathook to achieve a better angle of pulling force on the plug. After removing the plug, activate valve and check for leaks. You should not have any around the valve stack joints! If you do, carefully tighten the bolts a little bit more. If you have seepage around tailpipes or elbows that are screwed into a female topped valve, check the Teflon® tape around the threads. You may need to clean and reapply tape and reinstall. Congratulations! You should be done.
Do’s & Don’ts
Do Activate (use) your seacocks regularly. An unused seacock of any materiel or make will not function when needed if allowed to sit and seize from lack of use. Marine growth can foul inside and greatly inhibit water intake flow if valves are left open without activation regularly. This can harm the equipment they serve.
Do Activate (use) your seacocks regularly. An unused seacock of any materiel or make will not function when needed if allowed to sit and seize from lack of use. Marine growth can foul inside and greatly inhibit water intake flow if valves are left open without activation regularly. This can harm the equipment they serve.
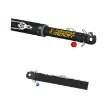
Don’t Do not force metal tailpipes into Marelon® valves. Bronze can be used with Marelon® as long as you do not cross thread or over tighten fittings. Marelon® valves on bronze thru-hulls were quite common for many years without problems if installed properly.
Do Check your valves regularly. These are critical to the safety of your boat. Any valve that is not functioning properly, is hidden or obstructed and cannot be operated quickly in an emergency is dangerous. Replace them and be sure you can operate them easily. Know where every seacock is on your boat and its specific function. Make a “valve chart” identifying location and function of every valve. If not already tagged, make a valve identification label for each valve and note its function on the label. This will help your inexperienced crew or passengers in the event of an emergency.
Don’t Never leave a boat unattended with a thru-hull plug/cap in place. This plug is not a permanent thru-hull cap. Never operate the vessel with this cap in place. Do not take valves apart except for replacement or emergency. They should not require service other than routine activation as mentioned above.


